


Wacker Neuson WP1540 & WP1550 Belt Replacement: A Complete DIY Guide
Posted by David Schatz - Technical Content Expert at DHS Equipment on May 9th 2025
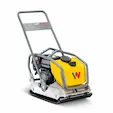
The Wacker Neuson WP1540 and WP1550 plate compactors are renowned for their durability and efficiency in construction and landscaping projects. However, like all machinery, they require regular maintenance to ensure optimal performance. One critical maintenance task is the replacement of the drive belt, which transfers power from the engine to the exciter system. A worn or damaged belt can lead to decreased compaction efficiency or complete machine failure.
This comprehensive guide is tailored for construction professionals, equipment rental businesses, and DIY enthusiasts. It provides step-by-step instructions on inspecting, removing, and replacing the drive belt on WP1540 and WP1550 models. Additionally, it offers insights into preventive maintenance practices to extend the lifespan of your equipment.
Understanding the Importance of Drive Belt Maintenance
The drive belt in your Wacker WP1540 or WP1550 plate compactor plays a pivotal role in transferring power from the engine to the exciter system, which generates the vibrations necessary for compaction. Over time, belts can wear out, stretch, or become damaged due to continuous use, exposure to debris, or improper tension. Regular inspection and timely replacement of the drive belt are crucial to maintain the machine's efficiency and prevent unexpected downtime.
Identifying Signs of Belt Wear and Failure
- Visible Cracks, Glazing, or Fraying: Inspect the belt for any visible damage.
- Slipping or Squealing Noises: Unusual sounds during operation may indicate belt slippage.
- Reduced Compaction Efficiency: If the machine isn't compacting as effectively, the belt might be the culprit.
- Excessive Vibration: An improperly tensioned or damaged belt can cause abnormal vibrations.
Troubleshooting Common Issues
- Belt Slippage: Adjust spacer setup to correct tension. If tension is correct, check condition of belt pulleys.
- Vibration: Inspect for worn shock mounts or misaligned pulleys.
- Noise: Verify belt condition and secure all hardware.
Tools and Materials Required
- Replacement Drive Belt: 5100044733 (replaces 5000111158 and 5100016461)
- Socket Wrench Set
- Flathead and Phillips Screwdrivers
- Gloves and Safety Glasses
- Cleaning Rags and Mild Solution
Safety Precautions Before Starting
- Let the engine cool to avoid burns.
- Ensure proper ventilation.
- Use safe lifting practices.
Step-by-Step Guide
Removing the Old Drive Belt
- Pivot the guide handle forward for better access to the belt guard.
- Remove the belt guard cover
- Loosen the pulley assembly: remove four nuts and lock washers holding the pulley halves and spacers together.
- Carefully remove the outer pulley half and slide off the old belt.
Installing the New Drive Belt
- Place the new belt onto the exciter pulley.
- Install three spacers and the outer pulley half with the belt in between.
- Secure the assembly with lock washers and nuts.
- Check belt tension. Target deflection 1/4 to 3/8 inch halfway between the pulleys
- Reinstall the belt guard cover.
Adjusting Belt Tension for Optimal Performance
After the first 20 hours of use on a new belt and every 50 hours after that check belt deflection and adjust as needed:
Target deflection: 6–9 mm (1/4 to 3/8 inch) halfway between pulleys - If outside this range, adjust by changing spacer positions and retighten components.
Post-Replacement Inspection and Testing
- Ensure all fasteners are secure.
- Start engine and check for smooth operation.
- Recheck deflection after a short run and adjust if needed.
Preventive Maintenance Tips
- Inspect the belt every 50 operating hours.
- Keep the belt guard free of debris.
- Monitor and maintain correct belt tension.
- Replace worn or damaged components early.
Recommended Replacement Belt Specifications
- Part Number: 5100044733
- Replaces: 5000111158, 5100016461
- Compatible With: Wacker Neuson WP1540, WP1550
- Type: V-Belt, A27
- Material: Rubber
Frequently Asked Questions
Q1: How often should I replace the drive belt?
Inspect the drive belt every 50 hours of operation. If you notice visible wear such as cracks, glazing, fraying, or if performance drops - replace it immediately to avoid equipment failure or costly downtime.
Q2: Can I use a non-OEM belt?
OEM belts, such as Wacker Neuson part number 5100044733, are designed for optimal fit, tension, and longevity. However, DHS Equipment is proud to offer DHS Quality Parts aftermarket alternatives that provide a cost-effective option without sacrificing performance - backed by our Quality Guarantee and trusted by contractors, fleet managers, and DIYers alike.
Q3: What if the new belt slips during operation?
Slippage is typically caused by improper belt tension. Check the deflection between the clutch and exciter pulleys (aim for 6–9 mm). Adjust the number of spacers between the pulley halves to increase or decrease tension as needed.
Q4: Is it necessary to reinstall or replace the belt guard after replacement?
Yes. The belt guard protects the drive belt from debris and physical damage. A damaged or missing guard can shorten the belt’s life and pose safety risks. Always reinstall a functioning belt guard before running the machine.
Q5: Where can I purchase the correct replacement drive belt?
You can purchase the OEM Drive Belt, Part Number 5100044733, directly from DHS Equipment. Order here
Conclusion
Proper belt replacement is a crucial step in maintaining the longevity and performance of your Wacker WP1540 or WP1550 compactor. Whether you’re a contractor, rental manager, or operator, following these steps ensures safe, efficient operation and helps you avoid unnecessary downtime. Choose OEM or trusted aftermarket belts and stay proactive with regular maintenance.

Author: David Schatz
David Schatz is the founder of DHS Equipment and a technical content expert in light construction equipment, small engines, and professional-grade replacement parts. With more than 30 years of hands-on experience servicing concrete saws, generators, water pumps, and plate compactors, he helps contractors, rental fleets, and serious DIY users keep their equipment running safely and efficiently.
Through practical, no-nonsense articles, step-by-step guides, and maintenance tips, David focuses on real-world troubleshooting, small engine repair, and clear recommendations on OEM and high-quality aftermarket replacement components that reduce downtime, extend equipment life, and improve job site productivity.