
Wacker Neuson Trash Pump Won't Pump Water? Complete Diagnosis & Overhaul Guide
About this video
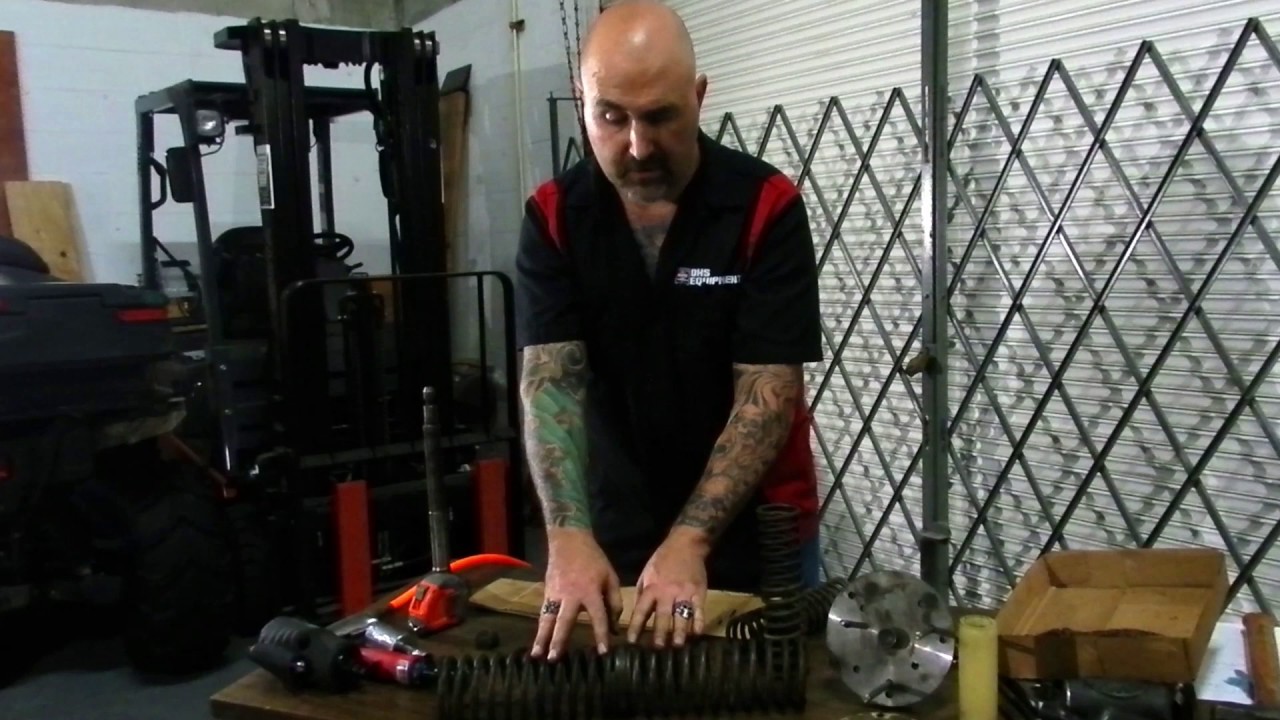
Is your Wacker Neuson PT2, PT3, PT4, PT6 Trash Pump losing suction or discharge pressure? In this comprehensive guide, Dave Schatz from DHS Equipment walks you through professional diagnostic testing and a complete pump overhaul using our DHS Equipment PT3 overhaul kit made with OEM Wacker Neuson parts. Learn how to properly test suction pressure (measured in inches of mercury) and discharge pressure (measured in PSI), identify worn components like the impeller and volute insert, and perform a complete overhaul to restore your pump's performance. What You'll Learn: ✅ How to perform suction and discharge pressure tests ✅ Common causes of pump performance issues ✅ Step-by-step pump disassembly and rebuild process ✅ Proper shimming techniques for volute inserts ✅ Mechanical seal replacement procedures ✅ Safety precautions during pump maintenance Shop the DHS Equipment PT3A Overhaul Kit: https://buff.ly/2iUGN34 Chapters: 0:00 - Intro: How to Test a Wacker Neuson Trash Pump's Suction 0:55 - Understanding Suction & Discharge Pressure Specs (PSI vs. Inches of Mercury) 3:28 - Analyzing Test Results & Common Job Site Suction Problems 4:21 - Diagnosing Air Leaks vs. Worn Internal Components 6:03 - How a Worn Impeller & Volute Insert Cause Poor Performance 8:03 - Step 1: Pump Disassembly (Removing Intake Housing) 9:33 - How to Remove the Impeller (Tool vs. Impact Wrench Method) 10:13 - Step 2: Removing the Old Mechanical Seal 12:01 - Inspecting the Wear Plate & Replacing Housing Seal Rings 13:32 - Step 3: Installing the New Mechanical Seal 16:43 - CRITICAL SAFETY STEP: Disable Engine Before Installing Impeller 17:37 - Replacing Fill Cap & Drain Plug O-Rings 19:32 - Step 4: How the Flapper Valve Works & How to Replace It 22:14 - Step 5: Disassembling the Volute & Front Pump Cover 25:13 - Step 6: How to Properly Shim the Volute Insert for Correct Clearance Need parts or support? Contact DHS Equipment today at 866-611-9369 or [email protected].
Transcript
196 segments · auto-generated captions
Transcript
196 segments · auto-generated captionshi I'm Dave Schatz with DHS equipment today we're going to go over a couple of test procedures on the wacker PT three trash pump then we're going to go ahead
and do an overhaul on the pump in with an overall kit that we put together here at DHS equipment we're gonna go ahead and take the pump outside we're gonna
prime it fill it with water we're going to do a suction test the suction test is going to be done with the use of a vacuum gauge the vacuum gauge is
measured in inches of mercury one inch of mercury on the gauge is equal to one foot of suction left so we're going to do this suction gage the suction test
then we're going to do a discharge pressure test the discharge pressure test is measured in psi 1 psi is equal
to two point three foot of delivery height that's important if we're discharging the water straight up that's what delivery height is so one PSI is
equal to two point three feet of delivery height this particular pump is has a spec of 95 feet so 95 feet at 2.3
feet per inch we should be measuring about 41 psi and when we do our test okay so we're gonna head outside we're gonna do the test then we're going to
come inside and we'll explain what the results of that test mean and won't proceed from there
[Laughter]
okay so we tested the outside and the results were not so great on the sectional side we were only getting about 18 inches of mercury on the gauge
which means we're only gonna get about 18 foot of suction left this poem has a spec of about 25 so not that great we
need to see what's going to affect suction on this pump if you're out on the job site you could you could possibly have problems with the stranger
being clogged you could have a hole or damage on your suction hose you can have a damaged gasket or a missing gasket when you hook it up to the pump so
anytime you're going to test the pump it should be the pump itself not a job site condition so when we go to the pump itself and we look for such a problems
we're going to look at engine rpm should be about 3,600 the other thing that's going to affect suction is the water
level when you go to test it the pump needs to be full of water the other thing there's our air that we get air
leaks on the flapper valve where the the port gets mounted to the housing we have an air leak up on the fill port you can
have an air leak on the drain port you can have an air leak on the main pump housing gasket if you're sucking air you're not going to have very good
suction so those are a couple of things that we're going to look for for such problems if we find that our organs are
good or our p.m. are good if we find out the water level is good and we still have before suction then we have to look at
one components the two biggest things that are going to wear inside of a pump is going to be the impeller and the loop or the balloon insert if it's got an
insert the other thing that we're going to look for is the results of the discharge test the discharge pressure test what it's thirty four o'clock
simple third it to a point three feet / / psi that's only gives us about 69 out of the 95 foot of delivery height that
this pump is capable on so what are the things that are going to give us a discharge problem we can scratch that
off the list and then the other thing that's going to give it to delivery issue or a pressure issue or the the two team components that give us such an problems either the insert on the
balloon and the in color now as the empower gets worn and as the insert gets worn it creates a gap between the two and the larger the gap the less
performance this pump is going to give you so in most cases if if your your RPM is right your water is at the right
level there's no obstructions on the intake side or the output side of the pump you generally have to look at more components again the two main work
components we look at the impeller and the insert so we're going to go ahead and take a look at this right now and we'll look at the appellant we'll look at the insert and we'll see what we find
for the purpose of this test and the video what we did is we actually removed the shimmers and we removed the insert
before we did the test this were pretty much simulate a warning color and a warned insert insert the volute the
ships and the whacker offer shims anywhere from a quarter millimeter up to about one millimeter but the insert itself is about 3/16 of an inch so when
we remove this and we we put this cover back on we got this we got the test results that we have we had a low suction and low discharge pressure and
that is ultimately because we removed this insert again that just simulates popcorn impeller and the worn worn
insert so what we're going to do is we're going to go ahead and do a pump over all right now we're going to go ahead and inspect everything we're going
to rebuild everything we're going to retest the pump and we're going to show you how to shim the insert and how they determine how many shims get put onto
the behind the insert at night ok so we're going to go ahead and start with removing the impeller and the mechanical seal and the gaskets on the pump side
and then we'll go over here and deal with the loose side okay to start with I'm going to remove this in court intake
housing because we're going to replace the plot the flapper the flapper is part of the overhaul kit that we have and I'm also going to remove it just to make it easier to see what's going on elsewhere
okay next thing we're gonna do is we're to remove the impeller the impeller can be removed a couple of different ways the impeller the impeller
has a cast and bolt head this way you could put I believe a 19 millimeter socket on it hit it with your impact turn it counterclockwise that'll remove
the Empowered the only problem is if your repeller is worn the same abrasiveness the same jump that you've been pumping that where's
the impeller and where's the insert is probably worn this off a little bit and your corners are probably grounded and you may wind up putting a sock on there
and just rounding it off so it's possible it'll work but about a hundred percent the other leg is with this
impeller removal tool part number one five eight nine three eight one we have this on our website it's very useful tool now the thing about this impeller
tool it's good for the two-inch and the three-inch trash pumps but the new style only this is the version where the impeller threads on to the shaft the
older style PT 2 PT 3 pumps slid on to a key chat and we're held in with either a castle nut or a bolt or something like
that so this will not work on the old-style pump it will only work on the version where the impellers are threaded on so we're going to go ahead and remove
me and now it just fits right down on the on
the outside of being in the impeller take a look at there okay
so we'll finish removing the impeller by hand and now we're left with the
mechanical seal we're going to just pull off this half the mechanical seal this is the half that meets with the part that's pressed in this has a little
rubber boot that slides over the shaft and this goes behind the impeller next thing we're going to do is we're going
to remove the mechanical seal the mechanical seal is pressed in and it's held in place with just an all-way so
we're going to go ahead and try that out of there it's not too bad and I'm trying to do it so where you can see it on the video
you see it's just got an o-ring all the way around it and there's that all ring that squeezes into place and keeps it in place so that's how you remove the
mechanical seal the last thing in here is is a wear plate this plate right here
it's not part of the overhaul kit but is it is an option what this plate is designed to do is just protect the pump
housing if this wasn't here you've just got the pump housing right back there right now if this plate gets worn it to replace the ball it's about 30 bucks or
so if this wasn't here this steel plate wasn't here once this housing starts to get warm you've got to replace the whole housing this housing is very expensive
so they put this metal plate to protect the housing so you may or may not need it you'll have to take a look at the condition of yours it is an option when
you buy the overall kit it's not needed unless you're restorative horn okay so the other thing in here is the battle ring glory and part of the kit time you
see we've got the four bolts that fold this housing to the engine behind every one of those bolts is a copper seal ring
just a little copper seal right and once that's going to do that's going to seal seal the back of that bolt it's going to seal the pump housing from the engine
if this seal gets damaged or this seal starts to get worn or a bolt gets loose and all of a sudden they start shaking around and getting worn you could suck
air from the back housing the back of the of the pump so a part of this kit are for seal rings for these bolts if
you know you don't need to remove the complete housing from the engine to do this I would just remove one bolt at a time replace the seal ring put some
medium strength thread lock on there and these get torqued down to 14 foot pounds so I would just remove one replace the ring then do the other one just a
crisscross pattern again blue like tight 14 foot-pounds one bolt at a time and that will seal the back of the pump the
next thing we're going to do we're going to go ahead and install a new mechanical seal okay so now we're going to install the mechanical seal again because the
mechanical seal presses in it's got that little o-ring sometimes it's a little bit easier if you put a little bit of grease right around the o-ring we're
gonna put a little bit of grease on the o-ring now we're gonna press it in
before you president just take a look at the mechanical seal the backside of the mechanical seal has a couple of grooves in it that the grooves go towards the
engine the portion of the mechanical seal that we pointing out is this is the flat smooth side okay so now we're going
to go ahead and press that
okay once that's in we need to make sure it's clean if there's any debris in any sand anything at all
trapped between the two making seals of that seal where damage it almost immediately so once it's in take a rag
or taken whatever and just knock off whatever you can and then once you knock off any debris come behind it with you
natured alcohol car cleaner a little brake cleaner whatever whatever you've got just a little bit of pressurized solvent just to make sure there's nothing stuck on to that mechanical seal
the next thing we're going to do is we're going to put the other half of the mechanical seal on the side right here with the mating surface is the other
part of the seal this rubbery part is towards the impeller it's a it's a little bit of a smoke fit and we've got
some the metal threads over here in this rubber boot we don't want to do any damage to it so what we're going to do is going to put a little more grease right in here so it slides past that a
little bit easier just a little bit okay get our spring
make sure there's nothing on that seal now we're gonna slide it right over the shaft okay next thing we're gonna do is
go to put our color up before you put the impeller on for safety purposes you need to either turn the engine switch
into the off position or take your spark plug boot off you don't want this engine to start while you're doing this when you remove it you're going opposite
you're unscrewing this from the shaft but now that we're screwing it on to the shaft once you bottomed out and you could possibly turn the engine you don't
want this engine to possibly start well this impellers on your hand so pull the spark plug boot turn the switch off make sure that engine is not capable of
running when you're going to install this impeller so we're going to go ahead and install the Impala right now by threading it back onto the shaft
okay see that that could potentially start an engine so make sure your engine has been disabled engine switch off or spark plug boot poles now that the
impeller is in place our four seal rings have been replaced we're going to go ahead and put the new bull ring back here this is one of the several orange
that come in the kit
there's a little lip that it sits right on
okay so that old ring is in place part of the kit there's a new o-ring for your
cap just pops right off the cap
place it in the new one these o-rings are very important that this Ori is damaged or knit they're missing you're
going to suck air from right around here and you want to achieve suction on your club destroyed club same thing and move
this o-ring that one
on the jobsite you're constantly filling this pump and your puzzly draining the pump to clean it it's very possible you could do damage to these more so than
you can with the internal ones I would never get rid of these these are always good to have the spares I would just simply put them right here and let them
hang out there you've always got one in case of an emergency okay so now that that's done we're down to the flapper
flapper valve doesn't that stop you think pumping water doesn't that stop the pump from sucking water up the flapper valve the main reason we've got
the flapper valve it maintains the water so you that's when somebody refers to it as a self priming pump it doesn't self
Prime it'll maintain the Prime you still need to fill the pump one time at least get the water in there what this does this this allows the water to not come
back out so it allow the water in but it will stop right here and it won't allow the water to come out so this flapper valve prevents the water coming out so
the next time you need to pump so long as you've got water in here it'll start again without this you'll lose water and then you won't be able to climb it until you fill it again so that is the purpose
of the flapper valve well we put this in we're going to do the same thing as we did with this heal range we're gonna do one corner at a time because if you
tighten this corner too much you're gonna squeeze this and you may create an air gap between here and once again if you're sucking air around the gasket you're not going to pump water you're
not going to suck water the little rigid part the little world the little ridges go on the inside and you can see on the
back of the port it's got the little slot over here and it has the little slot the little piece that fills the slot so you know which direction you're
going to be putting it on we've got our four balls again we're
going to go ahead and use a medium strength lock type looks like a blue loctite we're going to do a crisscross pattern and snug this up this is going
to get torqued to 18 foot pounds
okay now this is bolted on for the most part if this part of the pump is done now we're going to go move on to the
front cover of the loot section and deal with the inserts and the end the shims okay now we're going to address the pump
cover the volute the insert of the shims the pump overhaul kit that we have is going to include all the o-rings it's going to include set of four shims it's
going to include a new insert with the with the new nuts on the back the their lock nuts with nylon inserts it's going to include these three screws and the
seal rings that are behind these these crews these screws are what hold the volute on so we're going to go ahead and start we're going to take the balloon
off and we're going to replace those bolts and seal rings we're going to put the new insert and the shims that were in explain a little bit more about the
ships so let's start by removing they believe in order to get this last screw out you're going to have to remove one
of these screws and slide that handle out of the way otherwise that bolt won't come out all the way it will release the loop but you won't be able to replace
that seal ring until you remove that that one bolt slide the handle out so for our purposes we're just going to go ahead and leave it dangle there from
that
you'll get three of these bolts and three Z seal rings as part of the care [Applause]
this this is where one of the old rings are now here is the blue bit itself the
blued itself gets the will you insert this balloon insert is what we removed to simulate a worn insert and a worn
impeller which is why we have a low suction and low discharge pressure typically when you give this pump and it's new you've got a couple of really
thin shims behind it and it has three
lock nuts three lock nuts that hold it in place on the back so anyway without
that insert that's when we have that more suction for discharge and what what you would normally do if we weren't doing the complete overhaul but we still
had those those little figures what we would do is we would shim the insert only even if we didn't have any shims and we just had the insert then insert
is 3/16 to the mid so that's gonna bring that tolerance a lot closer than it was before so you're still going to get far better pressure and suction even if you
didn't have shims but we're going to go ahead and put some shims in and the number one question is how many shims do I plan how do I know when I've got too
many or not enough well lacquer doesn't have a way to test that other than putting the shims in putting the volute back onto the
cover and installing it back onto the pump and seeing if you're able to rotate that engine or not so it's a little bit of trial and error but that's what we're
gonna go ahead and do so what we're gonna do is put our shims we have new
shims that we've got we're gonna put our shims in we're just going to line those up with the bolt holes we're gonna drop
our insert back in okay because this is
trial and error we're not going to use the new lock nuts yet just the lock nuts have a nylon insert you should only use that once so for trial and error
purposes we're going to use the old lock nuts until we get the right distance in the right amount of shims and then once we have that right we're going to take
it off one last time put the appropriate lock nuts on and put the appropriate torque on okay now that the insert is in
I'm gonna go ahead and put the put this back onto the cover cuts back in and put
it on the pump and we're going to see it means motions where I have too many pins or what the story is okay so this is
back in place we've got we've got a couple of shims in there you may not need too many considering there's going to be a new empower and a new insert but
we're just going to show you what what to look for and how to know if you've got too many or not enough
this update sure it's on there go to full start the engine slowly jammed tight we have too many shims so
now we're going to go ahead and pull one or two shims out it's a little bit of a pain but it doesn't take too much longer
in this particular case I'm going to take out the thickest shim only because the impeller is new the insert is new
and I don't need that much that much more shipping so I'm just going to leave these real thin ones in and you see how that it goes the regime's you have left
may come in handy later few months down the road you notice a little performance drop and you take a pressure reading and
you're a little bit off you know more than likely you could just go right to this section put a couple of shims in close that tolerance between the
impeller and the insert and that should probably help you a little bit
able to pull the engine freely we removed the one shim that one shim seems to be the difference so we're gonna leave it the way it is so we're gonna
leave the shims in here and if we take a look I don't know how well you could take a look in there turns out this insert right now is about
flush with this housing before with the one millimeter extra you could feel that this was above above here and I guess
that was just enough to make that engine bite so essentially the impeller was pressing against here so to tighten too much for tolerance the thing is bound up
so we backed it off one millimeter this is now sitting flush and this is we're
going to go with so go ahead pull these bak nuts out
to the side and we'll use the new ones the new ones have the the nylon insert so on a lock note with a nylon insert
you really only want to torque those down once you don't want to keep reusing those okay these three lock nuts are
part of a it doesn't take much to tighten these there's a little these
little nuts get tore down to about seven foot pounds you don't need any thread lock because it's already a lock nut so this is ready we've got the new o-ring
get rid of that little ring so we've got the new o-ring that's going to go in here go ahead and set this up
okay this is where you're gonna do this your new bolts are your new seal ring put them right in and if you're
replacing it all you're gonna have to remove one bolt slide this out of the way to get that last bolt out so you can replace that bolt seal ring we replace
these bolts just because they they tend to get a little damaged though they're dirt rocks debris whatever so once you
do this once or twice you'll start to round them out or they'll just get kind of cruddy so for for that purpose we include these three bolts in the kit
okay when you put these on you're going to put a little bit of a medium strength thread Locker these get torn down to 18 foot pounds and then the last thing
we're gonna do I'm gonna replace these little rings again phone rings once you take these off you may notice this is a
fairly new pump but on the pump that's been around a little while you'll notice they start to take the take the shape of
between the pump and the the bevel of the housing and they kind of look triangular or flat at that point when they maintain that shape and it'll
bounce back to a roundel ring you tend to start to get air leaks in there so that's why we've got all the replacement own rings with that kit as well
okay so the last little ring is on here that's that's pretty much it we've got the we've got the new insert the insert
is shimmed we've got the new whole ring behind the volute we've got the two new o-rings for the pump housing cover that's it everything on here on the pump
in is new the o-rings the seal rings the flapper valve I think we're ready to put this together go test it okay next thing
we're going to do we're going to take this outside we're going to test it we're going to see what our new readings are on our vacuum gauge the new readings on the pressure gauge and let's see what
the difference actually is now that we put essentially a new a pillar and a new insert compared to before where we had
taken out the insert - to simulate a worn insert and a worn impeller so we'll see the vacuum difference we will see the pressure difference and you'll see
the the one component that really had so much to do with the performance of this pump okay so let's go test this outside
right now
okay so as you can see our pressure went up from about eighteen to twenty seven our discharge pressure went from
approximately thirty to about forty it's a little hard to detect exactly the gate shakes a little bit and also we lose a little bit of water
on the intake side when we're doing the discharge pressure side but we were pretty close to forty twenty seven on the vacuum this pump is performing very
well and other than the old rings that we did just for the sake of showing you what the overhaul kit does and brings none of that was actually necessary the
the problem itself that we put into it again was to simulate a worn impeller and a worn insert essentially those two
components have everything to do with the performance of this pump in the future if your if your vacuum is a little bit low and your pressures not
right you know now you would look for air leaks you could look for level of water things like that if your vacuum is great or your discharge pressure is low you know exactly what to look for if
you've got a discharge problem and the pressure is low you know that has everything to do with the gap between the impeller and the insert this overall
kit comes with plenty of plenty of shims as you can see it doesn't take very much before the before the impeller gets bound up against the insert which tells
you you have too many shims in there but you're going to have leftover shims so down the road the discharge pressure is a little bit low you could just go back
and shim it the same way we just did it now and you can increase that pressure if if for some reason you've got you do
this overall kit your suction and pressure still not where it should be then we need to look a little bit further weak but possibly have a problem
your balloon or something along those lines but that they're they're very rare the balloons don't get worn so often the main wear component is that insert and
that's about it you've got any questions you can certainly give us a call our toll-free number is 866 six one one ninety three six nine again we can be found online at
DHS equipment parts comm and I hope this hope this video was helpful for you thanks for watching
More in Repair & Installation

Diagnose | New Style Honda 4-Prong Ignition Coil | Honda: GX240, GX270, GX340, GX390
Jul 2, 2020
Wacker Neuson Exciter Repair: Maintenance Tips | BPU2440, BPU2540, BPU2950, BPU3050
Jun 25, 2020